Monday, July 30, 2012

Think Christmas Blog Hop & Giveaway

Think Christmas Blog Hop!
Its Time!  
Christmas in July!  
I am so excited to share what I have been doing with all of you.  

This is my first pieced quilt.  Last month I completed a Christmas cheater panel but that doesn't count .  

A special thank you to  Madame Samm for her inspiration and to Lesley, the Cuddle Quilter for hosting.  


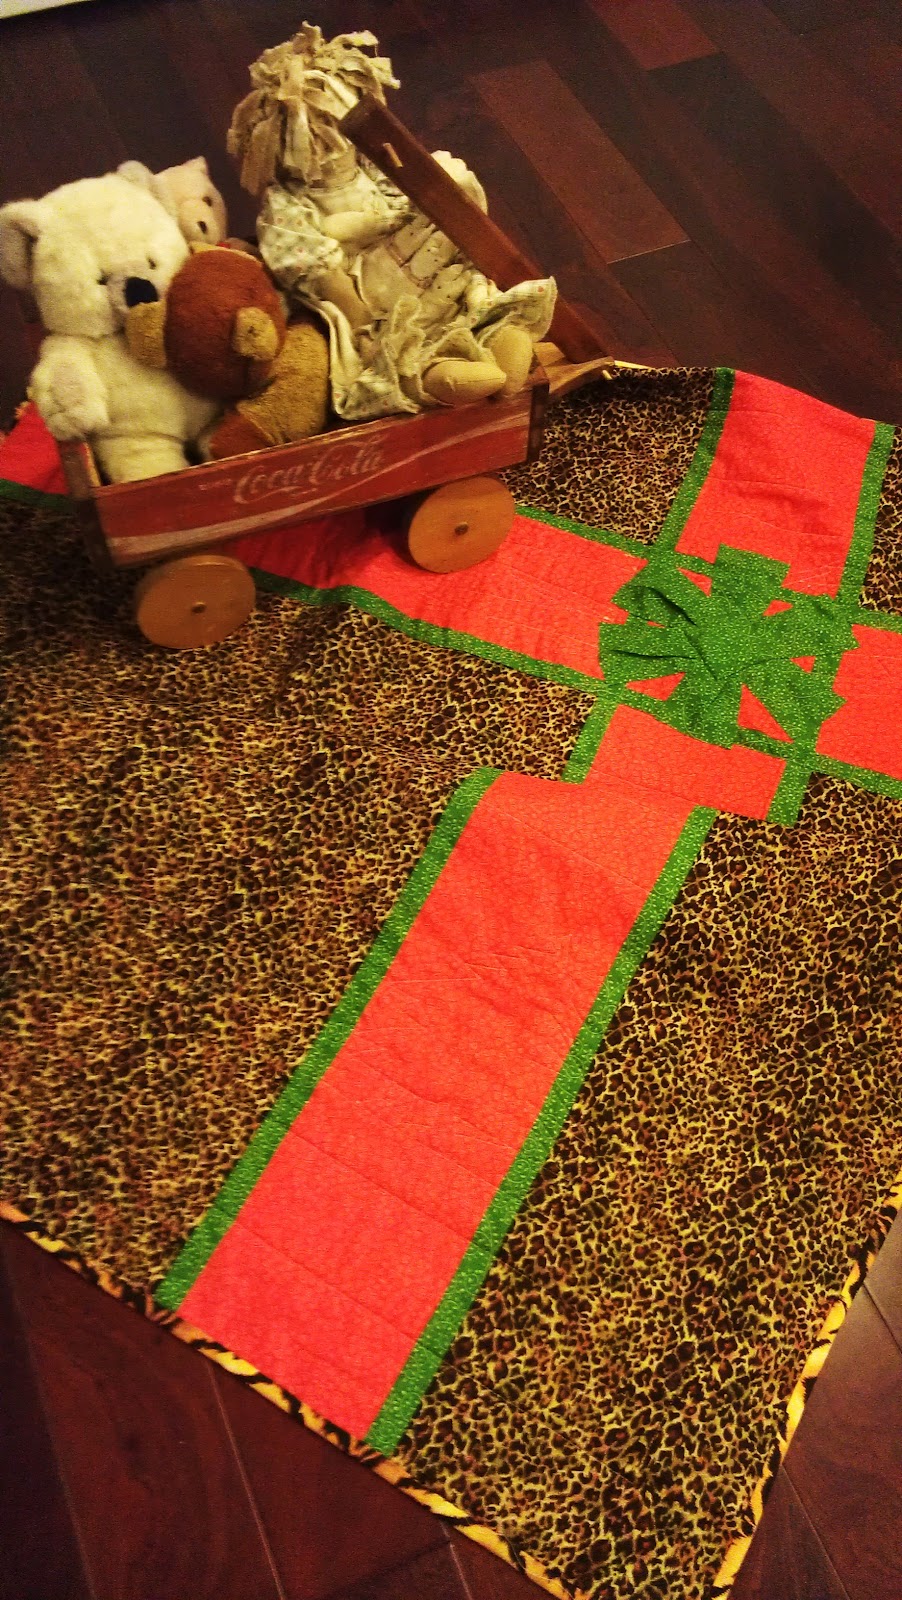
Animal skins backing along with a huge fabric ribbon and bow.
So here it is....mistakes and all!
I could tell you how I worked and drew and threw things away, and spilled pins, ripped out stitches and wore out my old sewing machine and cried and pouted and procrastinated but I will not burden you with that.

When I told Linda, my sister that I was making all sorts of mistakes she said, "Oh, well.  You could just write a humorous blog."

I have been so involved in my Christmas blocks this month the family has started singing Christmas songs and thinking Christmas right along with me. And if they are not, I have gentle reminders to Think Christmas.  My friend, Ellen, just closed on her new house.
I went to see it, looked at the bare living room and immediately said, "The Christmas tree will look great...right there!"

Think Christmas!!!


My Think Christmas July adventure has been to learn a new skill: Paper Piecing!
And what fun it has been.
My daughter and I sat down in front of an online tutorial and tried to follow it piece by piece, read the instructions, questioned the instructions, tried the steps, threw up our hands, tried again, changed tutorials and finally...
Got it!
And realized it is sew easy!
You just have to understand the first two steps and the rest will fall into place.

At first it was going to be only one block, 
just a little peppermint I designed .... did it.
Then on an impulse drew up a Christmas tree
and it looked so easy, I ended up doing nine and made it into a Christmas quilt.
I'll get back to the peppermints later.

Here are the details of the quilt:

Squirrels Christmas is 52" x62",
includes my version of a popular children's story
"Twelve little squirrels scampering up the Christmas trees,
One fell off and hurt his knee
Mama called Santa, and said he,
"No more squirrels scampering up the Christmas trees."
"Merry Christmas To All Creatures Great and Small" circles the border.
Twelve squirrels are hanging around but you will have to seek them out.You will find them on the nine blocks with Christmas trees.  Each block is different.
They are quiet little creatures going about their business in the trees, under the trees, skating the slopes or just chattering from below.
And the Christmas trees are decorated in red ribbon bows stitched to the branches. 
 The Squirrel's Christmas Quilt Pattern can be found either on my Etsy site or my Craftsy site as an Instant Download.


Giveaway Details!

Don't Miss out on My Giveaway!
I have an adorable stocking panel Joy.Love.Peace.Noel by Jacquelynne Steves for Henry Glass & Co.


 I bought a panel  for myself to make up
 and a second panel to share in a Giveaway.

Don't Miss Out!
To qualify for the stocking panel make sure you are one of my followers and leave a comment on this post.
The winner will be randomly selected at the end of our blog hop on August 6th.
Check back!


Joy.Love.Peace.Noel by Jacquelynne Steves for Henry Glass & Co


Here are the bloggers participating in 
Think Christmas 
July 30, 2012
Doodling in my Mind  (You are here)
Quilt Doodle Designs

Hope you are having fun!
I am!
Merry July Christmas!


post signature

Sunday, July 29, 2012

Think Christmas Sneak Peek

 
Yikes!  I am down to hours now!
And me with more more to do!


 Well, I loaded my bobbins and tied my bows!
I guess, it is time to go!


post signature

Tuesday, July 24, 2012

Fun Fabric Art


Is it just me or are your summers stressful sometimes?
All that fun can be just down right tiring!
The finished product: After adding alcohol, drying and then outlining in black with Sharpie.
The last few days six of my eleven grandchildren are together in my house and although it is fun it is not the normal chaos I am used to having. The kids are either hanging out on the couch or playing video games or eating or outside hurting themselves on their bikes,  or eating or swimming or oh, there is always...eating!

So when I asked my daughter-in-law if she had a bottle of alcohol she thought I had taken to drinking!

Uh...no!

The beginning: Adding color with sharpies on fabric
I just wanted rubbing alcohol for an art project.

 When it gets stressful at my house I turn to art projects. That is if I am not going to be grumpy....I recognize that not everyone is like that.  Some of them live in my house and wonder why in the world I keep starting projects.  But it makes me a happy woman to be creative and the grandchildren really love doing some of the projects.  

I keep Sharpies in all colors.  I buy pens even if I think I might be low.    I have all sizes, all colors and often two of the  colors.  I have been working on a quilt lately which means I have fabric nearby in various colors.
  1. I cut up cotton muslin in easy to handle sizes(mine or about 8" x 10"), pressed out the wrinkles then taped it to recycled paper to absorb the seepage of the ink from the Sharpies.  
  2. Then I showed the kids how to draw with fine tip markers, leaving enough white space for the ink to spread when the alcohol is added. 
  3. Once we finished drawing, we taped the fabric over a disposable plate or a glass baking dish or whatever you can find to suspend the fabric so it is not flat on a surface.  Using an eye dropper drip alcohol on the fabric and let the ink spread.
  4. Let dry completely.
  5. After dry, detail with a black ultra fine Sharpie.
Tip: Be careful not to put complementary colors next to each other unless you want drab colors. Complementary colors are red and green; blue and orange; and yellow and purple.  You may want to experiment a little with color and see which colors work best.  Yellow spreads well and is a great blender color for greens, and oranges.  

WARNING: Have enough fabric, the kids will love it so much they will want to do more than one. 

post signature

Friday, July 20, 2012

Twas the Week Before Blog Hop


Twas the week before blog hop and all through my house,
the machines are humming, and even the spouse!
The blocks are arranged and the sashings to spare,
and with stitches still needing to make the repairs.

And I in my nightgown and Papa in bed,
Could not settle down for evening...instead
Up in the night to finish my quilt.
I hastened my pace and quickened my guilt.
"I can't finish in time! I started too late."
I haven't the skills and can't meet the date!"

But yet, the day continues to draw near,
and all that should happen is all coming clear.
With great anticipation, and many good cheers,
the piecers are working and soon will be here!


Think Christmas Blog Hop!
post signature

Sunday, July 8, 2012

Paper beads for the kids to make!

 Paper Beads for the Kids to Make

Paper beads (Length  3/4") Completed by a 4 and 6 year old. 
On a recent shopping trip I found a display of colorful necklaces handmade by Uganda women.  They were so beautiful I bought my fair share and gave out some to my granddaughters, keeping a necklace for myself.  

I have never seen a craft I did not want to try so keeping to my nature I had to go home and start cutting strips to try to make the beads myself.   Of course, my grandchildren, keeping to their nature, wanted to do it, too.

To my surprise I found they were occupied for a long period of time , working intently on getting the beads made.  The carried through making more beads the following day.  We made a visit to our local Walmart and purchased stretchy cord for stringing the beads into bracelets which pleased the children again.  

Child's handmade paper bead bracelet. 
All in all this project is a winner in my eyes.  No expensive components to purchase, in fact, we recycled our paper.  The beads are very simple to assembly and even the little ones could do it. 

 Here is how I did it:
  • Cut long narrow strips as wide as you want the bead to be, tapering to the end. (We made them about 3/4" at the widest and a quarter inch at the narrowest.)  
  • Any kind of paper will work.  Get colored paper from magazines or whatever.  Printer paper weight or newspaper weight works best.  We used blue construction paper and it is was on the heavy side making the end pop up where we glued it. 
  • Wet the strip so it rolls easily, no need to soak, just get it a little wet to make it conform easily and start wrapping around a round toothpick starting with the widest end and tapering to the narrow end. 
  •  Use a little school glue on the inside of the strip as the end gets closer so it will stay in place.  We brushed it on with a paint brush then coated the entire bead but not the toothpick. 
  •  Let dry overnight. 
  • Use clear fingernail polish, or a clear varnish to coat the bead for a glossy appearance. 
  • Create a pattern of beads as long as is needed.
  • String into a bracelet with a elastic cord.  (.5 or .7) (We found a products called Stretch Magic  another called Beadalon Elasticity.  I'm sure there are other brands.)
  • Knot the cord and add a dot of Super Glue to keep the knot secure. 
The beads and bracelets shown in this blog were completed by a 4 and 6 year old.   They loved them!  

Think Christmas Blog Hop Update

I am scheduled for July 30th Think Christmas blog hop and have been working frantically getting my blocks done.  As always, I started with an idea, which evolved to another idea, which evolved to another idea so I am anxious to see myself where this idea ends!

In the meantime, I am having fun working on my paper piecing crafts!
So don't go stagnant this summer, keep working your crafting skills!  You'll be glad you did!

post signature