Tuesday, December 18, 2012

Making Fun & Making Faces


Another project using Sharpies on Dollar Store plates.

Just for fun.... but aren't they all?
Pearson, my four year old grandson requested a plate with funny and scary faces on it so I had to indulge him.

His little sister Blakely, who just turned three, did not "get" the scary faces.  She has been kept pretty sheltered from scary things.  For awhile she sat  examining the faces.  With a quizzical look on her face she looked up at me and touched the top of my head and said, "You don't have horns!"

I had to laugh then she laughed, too and I think she understood a little better that it was for fun.

And just in case you are wondering... that is a Cheerios drawn into the bowl, not a doughnut and yes, I took the picture upside down.  I noticed that, too but since the faces go all around which side is up is up to you.

So here is for Pearson....funny faces with scary (in a four year old fashion) faces.

See also, for instructions on using Sharpie markers on china: Fire Up Those Sharpies.

 post signature

Saturday, December 15, 2012

Fire up those Sharpies!

Something next to magical happens when a Sharpie is placed in someone's hands. 
The lines are clean and crisp and one design just leads into the next. 
I love working with Sharpies!

My kitchen now looks like a manufacturing kitchen....dishes everywhere but no food in sight!

So here's the scoop......I bought out the white china dishes at Dollar Tree. I bought several shapes and sizes of glazed white china.

The magic of a Dollar store find and a Sharpie!


I bought coffee mugs...coffee mugs that were tall and narrow, coffee mugs that were short and fat, coffee mugs with slightly fluted designs, and coffee mugs with little raised dots!

I bought plates...round plates, square plates, dinner plates and snack size plates! I even bought some red plates to play around with.
(Poor checker who got me, right? Took forever wrapping those glass dishes in paper to get me out of the store.)       

I stocked up on new Fine tipped Sharpies (the original Sharpies, not ultra-fine), made sure I had some alcohol...the kind that goes in the medicine cabinet and a few little q-tips for my many mistakes!

 Next I settled in for a  good old movie I could enjoy while listening because my attention is going to be on drawing the dish in my lap.

I started looking at those dishes and waited and waited and looked and looked even turned it in my hands as if that would matter!  And I waited for inspiration to strike me in the head like lightening....oh, but it doesn't work that way, does it?
So I took a deep breathe and got up the courage to put down the first mark!

DONE!
So there it is...the first mark! 
YIKES!
THAT WILL NEVER DO!
  Just gently wipe that stray mark away like a stray tear that slips out of the corner of an eye. 

Use a dab of  alcohol on a q-tip and wipe.  It will turn purple but wipe it again until it is comes clean using the other end of the q-tip.
I tried prepacked wet wipes for eye glasses not the wipes for  little bottoms. They work also, but I
had to keep the q-tips handy because I was using up all my wet wipes. 

I make many, many mistakes. 

Since I have the best job in the world...teaching art, I took all that glassware to school and let my students experiment on glass. 

Yesterday one of my students came by after school to show me her finished mug and get final instructions on firing the glass...in your own oven, by the way!
(And I call it firing not baking because we are talking ceramics here not cakes.)
Before she left she admitted to me,
 "I'm addicted to it now! It's so much fun."
Well, welcome to my world!!!!

Sing it Madonna....(oops!  Cyndie
, thanks Lisa!)
Girls just want to have fun-un!
Yes, girls just want to have fun!
So here are the simple, simple instructions:

Draw & Fire!
  • Place the glassware in a cold oven, set the temperature to 400-450 degrees
  • Begin your timing when the oven gets to the desired temp. 
    •  (Color markers lose their color in the hottest temps but red comes out red at 400 degrees in my oven.  Most colors faded but especially the cool colors:blue, green and purple.  Yellow turned brownish.) 
  • Fire about 40 minutes,  
  • Turn the oven off and leave the glassware to cool in the oven.  Cooling takes hours but you don't want to rush it because cooling too fast causes cracks and ruptures to form or even breaking. 
Most importantly, treasure your creative time!

UPDATE  UPDATE UPDATE!

Please, read!
Since I wrote this article back in December 2012 I have continued to experiment and have found a better method of drawing on porcelain which is dishwasher safe.

Any Color, Food Safe & Dishwasher Safe!
Using a product called Porcelaine paint which can be purchased online (I got mine through Amazon) and used small applicator bottles  to draw.(also, purchased through Amazon)

I drew as usual with my Sharpie.
Then traced my drawing with the small tip of applicator bottle in whatever color I wanted.
Allowed to dry 24 hrs then fired in my own oven at 300 degrees (150C) for 35 minutes.
The paint is more dimensional so it is slightly raised but I think that adds to the charm.
As I write this I am putting a much used dish in the dishwasher with not even a slight concern as to whether or not it will come out as I put it in.  It will!

So keep drawing with those Sharpies but make your dishes dishwasher safe with Porcelaine paint plus add colors.  Colors come out fairly true!

And thanks, Lisa for correcting my two year old mistake. Cyndi Lauper not Madonna sang "Girls Just Want to Have Fun."

Another design but made for the kids at Making Fun Making Faces 
post signature


Saturday, December 1, 2012

Wreath, Angels and Bells...Oh, my!


Finished wreath hanging on my school shelves.  Well, it even makes the storage shelves pretty.  Now it adorns the door in the main office. 

Cardboard tubes for wreath
Spray painted red with a touch of diamond dust...all we need is a bow now.
Student's Angel
        My room at school is overloaded with fun projects my students are working on and it is like the kids are on bungee cords.  They keep coming back to my class when they are supposed to be in other classes. 

One magazine folded and attached to a hand painted mat board. 
They must be having fun. 

Here are some of the fun things happening in my classroom.  (All photos are student projects.)

More photos as projects are finished.

Two National Geographics Magazines
Origami bell with embellishments of diamond dust , ribbon and bow

 
Front view of Old Book Angel
Side view: Book cover/ wings


post signature

Friday, November 30, 2012

A Family Tradition: Christmas Ornaments


I can not remember a Christmas without making my own ornaments.  Linda and I used newspapers, egg cartons, toilet paper tubes or whatever else we can get our hands on.  We were green before green was green!

Although, I am not sure we could call ourselves truly green since we glittered things to pieces!  
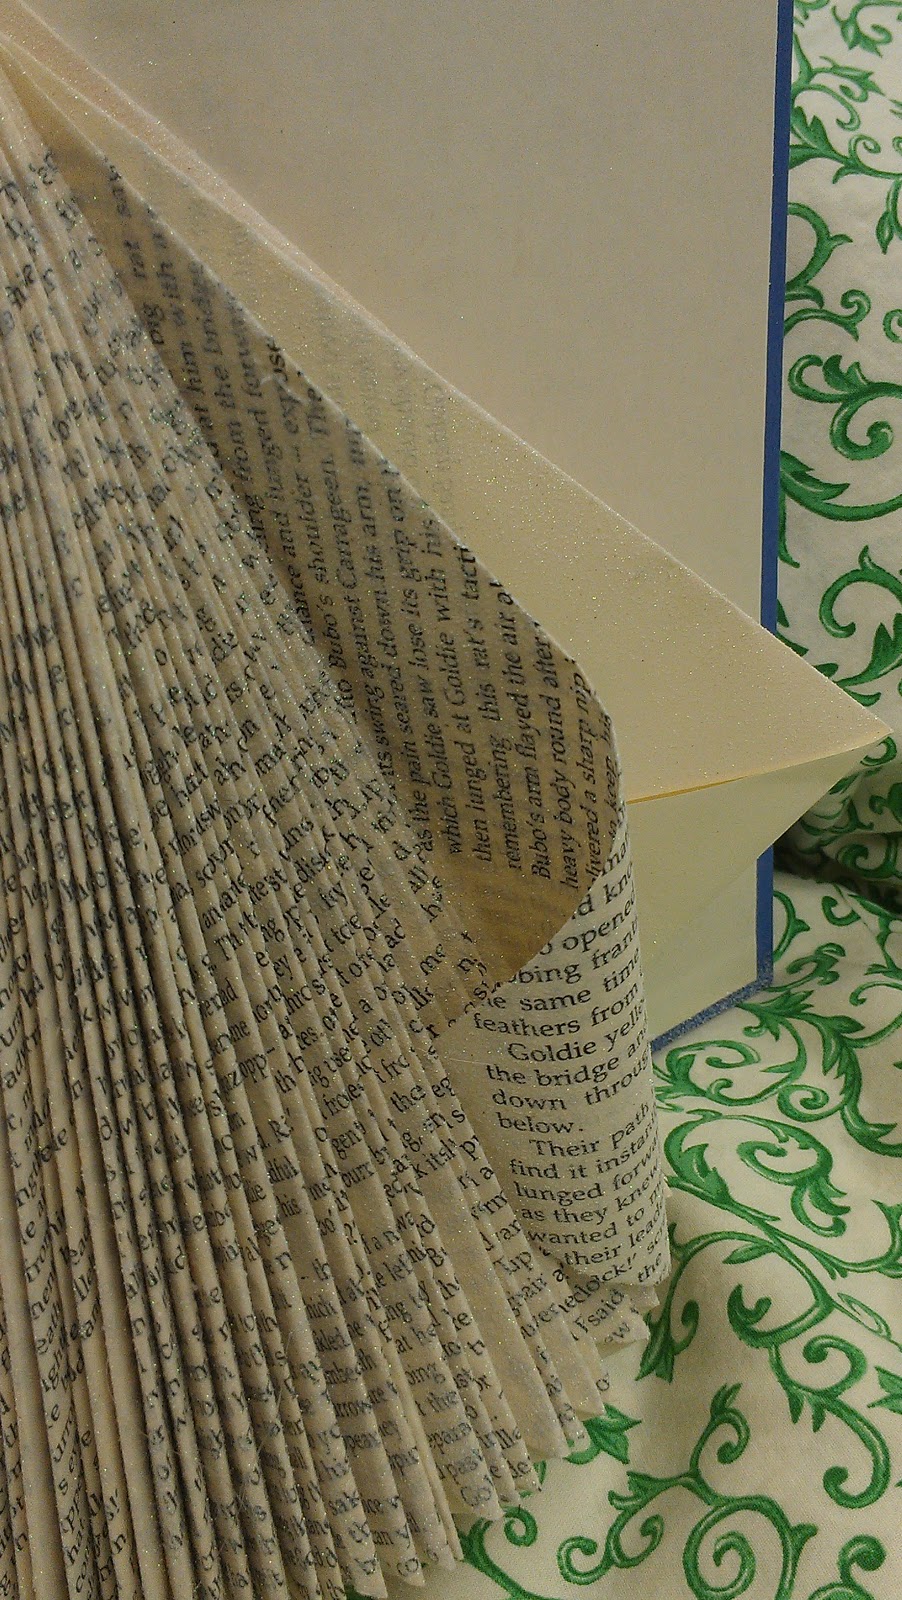
The papers available now are just too much fun to not use. So go green if you wish but for this project make sure your paper is thick enough like card stock.   In the past we may have used pages out of old wallpaper books we collected from venders when the papers were discontinued.  I had a closet full of wallpaper books. My children were free to use them when they were being creative.

But I have to be honest. This is not one of my green projects.  I am using scrapbook paper for this project.

The HOW-TO:


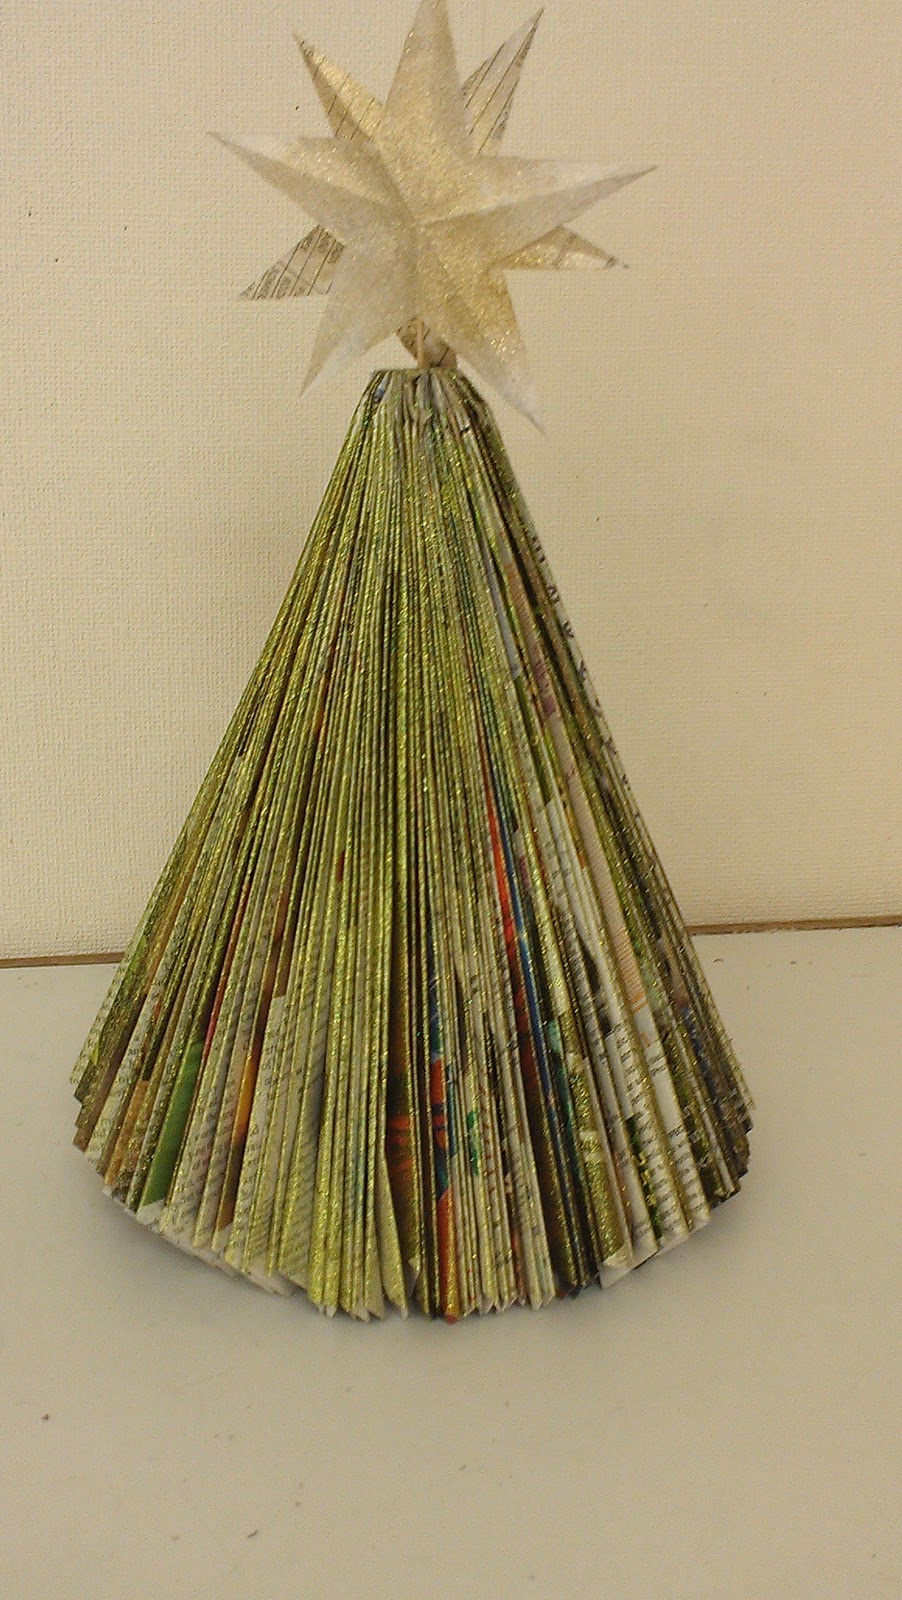
The basic design is an origami bell that I learned from my big sister Linda who learned it from her teacher in school so many years ago.  I have no idea how old we were but she had to help me make mine in the early years.

Now as an art teacher I have my students do this project every year in my high school art classes.  The project has been popular with my students for years. 


Start with a perfect square of any size.
For every fold reopen the paper.
Ready?  Here goes...

The easy way to remember the steps is to remember hot dog, hot dog, taco, taco, kite, kite, kite, kite!
These are not technical terms but my students understand them and I can hear them say it while they work.
"Hot dog, hot dog, taco, taco, kite, kite, kite, kite.."

    Hot Dog Fold
  • Hot Dog (Fold the paper in half creating a rectangle thus the hot dog bun.)
    • Open fold
    • Hot Dog (same as above)
    • Open fold.

    Taco Fold Upside Down
    • Taco (Fold the half from point to point making a big triangle...aw-w, that taco went upside down!)
    • Open fold.
    • Taco (same as above)
    • Open Fold


    • Turn paper over and work from the backside. 
    • Kite (Turn the paper to make a diamond shape.  Place a finger on the top corner to anchor in place.   With the other hand pull up one of the side corners and fold to the center of the paper, lining up the edge of the paper to the center fold.  Repeat on the opposite side to make a kite shape.  
    • Open folds.
    • Kite (Repeat folds as above on next corner)
    • Open folds
    • Kite (Repeat folds as above on next corner)
    • Open folds
    • Kite (Repeat folds as above.)
    • Open folds.
Octagon shape in the middle
If all folds have been made you will see an octagon shape in the middle.
Gentle pressure on the sides
Gentle press inward on the middle of each side so the sides begin to push inward.  At the same time as you begin to push upward with the four sides, press in the middle to make the middle of the bottom push outward.

Gentle shape the bottom of the bell, creating hills and valleys along the folds. 
Hot glue along point where all four sides come together.


 Okay, now go a step beyond and start some ornamentation to make it distinctly yours.
  • I hot glued rosettes to mine by cutting a circle then cutting it into a spiral.  I used various size circles. 
  •  Use a toothpick and start with the outside edge swirling it around the toothpick. Hot glue in place using the center of the swirl as a base.  
  • Cascade the rosettes downward and add leaves.  
  • For the leaves cut out a leaf shape, fold it down the middle for a central vein, then fold the reverse direction toward the top end of the leaf on each side to push the leaf downward.  
  • Add curly ribbons and you are finished.  

Gorgeous!!


post signature


Thursday, November 29, 2012

New life for an old book


Oh, it is nearly Christmas again and that means Christmas projects!  Linda and I always spent our evenings after school and weekends making ornaments and doing projects related to Christmas.  I still think the best projects happen in December and the time leading up to Christmas.

One of my fond memories is making an angel in the garage out of my dad's old Popular Mechanics magazines.  After all, what good were they? They were just filled with not so pretty pictures and had lots and lots of writing.  He had stacks of them in the garage so Linda and I just helped ourselves to his magazines and started folding.

When we brought out the beautiful angel Daddy did ask what magazines we used and he did have a strange look on his face when we told but I never heard any complaint!

I guess, we were really cute back then!  I wonder if I could get away with that today?

This week I requested magazines from our school librarian for my art classes. She supplied me the magazines as requested and threw in some old books as well.   As soon as they fell into my hands the old folding memories resurfaced.  I had kids folding pages in minutes.  As I folded I let the book tell me what it wanted to be.  This book wanted to be an angel but we had many various Christmas trees using the same concept.  

The How-to:

(I started with an old book with yellowed pages and thicker paper with 200 pages.)

The Folded Page:

  • Each individual page has three folds: 
    • 1st: Top right corner to inside seam.   
    • 2nd fold: Folded edge of page to inside seam. 
    • 3rd.  Turn up triangle that hangs off the bottom.   
  • Next page: same as above until all pages are folded.

Sleeves and Wings:

  • Pull out pages where you think the arms should be.
  • Unfold page leaving only the first fold.
  •  Tuck tip of page into one of the pages in front of it to create a curved sleeve.several pages in front of it.
  • The hard cover and the fly page folded in serve as wings.

Head...Still re-purposing!

  • Wad up a plastic grocery bag into a ball  and place into another bag making it as round and smooth as you can.  
  • Cut a large circle out of an old white tee-shirt and cover the plastic ball with it stretching it tightly.
  • Hold fabric with a rubber band.  
  • Tape around rubber band and a little of the bag below the rubber band.   
  • Insert taped end into the gap made by the book binding.   

Scarf....oh, so easy and so cute!  

  • Sandwich a 6-8" square of that old tee-shirt fabric between two pieces of paper.  
  • Draw a circle about 4-6" or improvise and wing it and just cut the circle cutting through both papers and fabric. 
  •  Continue cutting in a spiral folding the edge of the circle about 1/2"-3/4" away from previously cut edge until you come to the middle.  Cut a tiny circle out of the middle and discard.  
  • Take an end in each hand and stretch fabric.  
  • It will twist and spiral downward.  
  • Wrap around neck letting spirals of scarf cascade downward.  Hot glue in place. 

Spray Glitter:  NOT re-purposing but oh, so nice!

I purchased spray glitter in the craft section of Walmart.  I used silver Glitter Blast.
Spray the entire angel including head and scarf.

Add halo using a length of wired ribbon about 6-8" long depending on head size.

I'm having so much fun!  
Can't wait until tomorrow so I can do more fun stuff!


post signature


Saturday, August 11, 2012

My Carafe Needs a Bib!

It never fails that after the morning coffee I have coffee on the counter and sometimes, dripped down my clean cabinet doors beneath the coffee pot.  All carafes leak.  I can be so careful to pour my coffee but there is that drip that will linger on the edge of the pour spout that finally makes it way to my counter.  Then you get a husband in there who does not care that it drips and you have a coffee puddle.  

My carafe needed a bib! 

So I made one!
Now, I thought all my problems were solved and I was so proud of myself for solving one little problem.  I even made coffee and drank two extra cups in the afternoon just to make sure it would work.

This morning I came in and made the usual pot of coffee and my carafe was wearing it's brand new bib.  I asked my husband if he would like to serve himself a cup of coffee while I watched.  It worked!  He poured his cup without one drip!  

I'm so happy!

Then he asked if he could pour me a cup and with that devilish smirk  he gets he started pouring before he was over my cup!  

Ugh!!!

Well, it doesn't cure the devil in those men but it did stop the drip from coming off the edge of the pour spout.


I made my bib from a fat quarter and the pattern just fits from corner to corner on printer paper.  
Click on picture then right click to save image to print.
Here is my plan.  
  • Place on fabric putting fold edge on fold.
  • Cut two pieces for front and back.  
  • Put right sides together and stitch around the entire pieces but leaven an opening big enough for turning.  
  • Turn the fabric right side out going through the opening created.
  • Press. Hand stitch or top stitch around the opening.  

Remember that coffee will stain so starting with a color that is already a coffee color made sense to me. 

I think I need another cup of coffee!
post signature

Monday, August 6, 2012

And the Winner Is.....

How fun!  Think Christmas has ended but the inspiration from all those great ideas will continue.
 I hope everyone found something that is perfect for you.


I have a Giveaway to complete.
 I used a random selection to pick my winner.
I do wish I could give everyone a stocking panel but since I can only do one I had to pick.  
And now I know who my winner will be.
The beautiful stocking panel by Jacquelynne Steves will be sent to 
Rosemary

Congratulations!
Her comment was:
Wow! That's your first quilt-love the "wonky" trees-reminds me of some of the real ones I've had! Your adaptation of the 12 monkeys into the 12 squirrels is great. We all learn from our mistakes no matter what our age. What kind of a machine did you get? Thanks for the opportunity to win some great Christmas stuff-that would really motivate me.
Rosemary
 So Rosemary please, email me privately telling me where to send your package . 
I used the email address provided and emailed you at the time of this post.   

Thank you all for your recent comments!
 I had so much fun doing the blog hop! 
I hope to do another soon.

post signature

Monday, July 30, 2012

Think Christmas Blog Hop & Giveaway

Think Christmas Blog Hop!
Its Time!  
Christmas in July!  
I am so excited to share what I have been doing with all of you.  

This is my first pieced quilt.  Last month I completed a Christmas cheater panel but that doesn't count .  

A special thank you to  Madame Samm for her inspiration and to Lesley, the Cuddle Quilter for hosting.  


Animal skins backing along with a huge fabric ribbon and bow.
So here it is....mistakes and all!
I could tell you how I worked and drew and threw things away, and spilled pins, ripped out stitches and wore out my old sewing machine and cried and pouted and procrastinated but I will not burden you with that.

When I told Linda, my sister that I was making all sorts of mistakes she said, "Oh, well.  You could just write a humorous blog."

I have been so involved in my Christmas blocks this month the family has started singing Christmas songs and thinking Christmas right along with me. And if they are not, I have gentle reminders to Think Christmas.  My friend, Ellen, just closed on her new house.
I went to see it, looked at the bare living room and immediately said, "The Christmas tree will look great...right there!"

Think Christmas!!!


My Think Christmas July adventure has been to learn a new skill: Paper Piecing!
And what fun it has been.
My daughter and I sat down in front of an online tutorial and tried to follow it piece by piece, read the instructions, questioned the instructions, tried the steps, threw up our hands, tried again, changed tutorials and finally...
Got it!
And realized it is sew easy!
You just have to understand the first two steps and the rest will fall into place.

At first it was going to be only one block, 
just a little peppermint I designed .... did it.
Then on an impulse drew up a Christmas tree
and it looked so easy, I ended up doing nine and made it into a Christmas quilt.
I'll get back to the peppermints later.

Here are the details of the quilt:

Squirrels Christmas is 52" x62",
includes my version of a popular children's story
"Twelve little squirrels scampering up the Christmas trees,
One fell off and hurt his knee
Mama called Santa, and said he,
"No more squirrels scampering up the Christmas trees."
"Merry Christmas To All Creatures Great and Small" circles the border.
Twelve squirrels are hanging around but you will have to seek them out.You will find them on the nine blocks with Christmas trees.  Each block is different.
They are quiet little creatures going about their business in the trees, under the trees, skating the slopes or just chattering from below.
And the Christmas trees are decorated in red ribbon bows stitched to the branches. 
 The Squirrel's Christmas Quilt Pattern can be found either on my Etsy site or my Craftsy site as an Instant Download.


Giveaway Details!

Don't Miss out on My Giveaway!
I have an adorable stocking panel Joy.Love.Peace.Noel by Jacquelynne Steves for Henry Glass & Co.


 I bought a panel  for myself to make up
 and a second panel to share in a Giveaway.

Don't Miss Out!
To qualify for the stocking panel make sure you are one of my followers and leave a comment on this post.
The winner will be randomly selected at the end of our blog hop on August 6th.
Check back!


Joy.Love.Peace.Noel by Jacquelynne Steves for Henry Glass & Co


Here are the bloggers participating in 
Think Christmas 
July 30, 2012
Doodling in my Mind  (You are here)
Quilt Doodle Designs

Hope you are having fun!
I am!
Merry July Christmas!


post signature