Monday, June 25, 2012

Summer Heat Up

Even in the shade today the temperatures are rising and it is just plain hot!  
I think our temps are getting up into the 100's now and yesterday it was 106 which is how hot it is expected to be today.


I went to Lowe's the other day and purchased misters to hang in the trees where we like to sit in the evening while the kids play outside.  It is supposed to make the temperature seem about 10 or 20 degrees lower.  But so far, no one has volunteered to hang them for me.  I may have to figure it out myself and just do it.  I can just see me hanging from the trees...and stuck!

It could be a new version to the "Help!  I've fallen and can't just up."
It could be, "Help!!  I've climbed up and can't get down!" 

Aside from the heat I have been working on little sundresses for the little girls.  (I say, it is for the little girls but actually, I have seen grown women wearing the same thing for blouses and with the width being at least 42 inches around if you fit it you can wear it. I have not gotten up the nerve to even try it.  I don't want to know if it doesn't fit me.  I can remember when I would have had room to wiggle in it.  Long ago!)
  I have designed the fabric panels for two different pillowcase dresses that are adjustable in size from 2 to 6X or thin women.

Usually a pillowcase dress is made using wide ribbon for straps but   my grand-daughters didn't like the big bows on the tops of their arms because the ribbon tickled them.

Instead I just made straps for them that are not adjustable. (Ran it through the casing and tack it in place once I established the proper width)

 Without the embellishment of the big bows on the top of the shoulders I felt the dresses needed something more.

For Reese who is six I added a silk flower pin.  I disassembled a silk flower from Walmart I had on hand and re-glued the flower pedals to the back of a rhinestone piece and then glued all of it to the back of a  pin back.  It can be removed during washings.


I pinned it to the base of the strap on the upper bodice. 

 Blakely is only two and a little petite girl.  I added a touch of daisy trim I found on her straps and made a ribbon bow glued to a  pin back
and pinned a bow on each side.  Her bows can be removed for laundering.

Look pretty!

Feel cool! 


Fabric Pillowcase Dress Panels are available.  The pattern is printed directly to the fabric so all you do is cut and sew.  Two styles available in my Spoonflower Shop.
Hearts all a Flutter (pinks and minty greens)
and
Blakely's Pillowcase Dress (Bright yellow, pink and a touch of green)

Hearts All A Flutter fabric collection is available by swatch, fat quarter or yards.


 post signature

Friday, June 22, 2012

Peppermint Candy Christmas Quilt


Quilting Mamas are all around me!  
I could not escape it if I tried.  
Linda, my sister  is biggest into it and she is the one responsible for twisting my arm into doing fabric design on Spoonflower.
So when I finally caught the bug most of them said, 
"Finally!"

Oh, boy, did I feel dumb when I had questions on every step I took.   I was determined to complete it all myself including the free motion stippling.

I made it through the construction fairly simply because I was using a cheater panel I had created and had printed on fabric.  How hard is that?

But then I wanted to start the real quilting part....the sandwiching of the layers with stitches....
The Magic.....Free Motion!


I twisted and turned all the dials on my old machine that I possibly could trying to make the magic that you would know to be free motion stitching.
I twisted it to the left and found the knots of thread waiting for me under the quilt.
Then I twisted to the right and thread hovered on top
... and still no magic happened.
I twisted my fabric from the right to the left,
 from the left to the right.
Still no magic!
Well, it just couldn't be me because after all.....I CAN DRAW!!!!
How hard can this be?

 It MUST be my old machine!
 
SO...I tried my mother's machine.

Still no magic!

Linda sat down and in about five seconds....magic!

I went back home and practiced!

Well, it may not be magic yet....but I am learning the tricks! 
I have a renewed respect for you quilters out there.  It really is an art. 

And as a side note...I almost completed the quilt on my old machine but...not quite!  As I was putting on the binding around the edges, my old machine ground to a stop and then it would sew only in reverse.  So time for a new machine.  I'm shopping around.

 This quilt is all
Mine!
Mine!!
Mine!!!

All the fabric designs in this quilt are my personal designs available through my shop on Spoonflower .  
This quilt was made from Peppermint Candy Christmas Cheater Panel, Mints for All and Peppermint Candy Christmas.  Other coordinating fabrics are available.  
Find them here.

My friend Mary Ann from Rocknquilts has a Giveaway you may be interested in checking out. The winner will be announced on the Fourth of July (2012).

Check in here to see what she has available.

Thanks, Mary Ann for a great opportunity. 


post signature

Friday, May 4, 2012

Where the Green Fern Grows


Entry in Fabric8 Design Contest: Where the Green Fern Grows


This is my newest design and I entered it in an International fabric design contest.  The Fabric8 contest is sponsored by Spoonflower and Robert Kaufman, a major fabric designer.  There were a ton of entries.

I am so excited to among the semifinalist in the contest.  For a little while I questioned whether or not to even enter.  I did a design and decided to go ahead and enter it.  When I saw all of the entries and they were beautiful I began to question myself.  The Spoonflower staff and the Robert Kaufman sifted the many entries down to the top 100.  
And I am on of the top 100!!!! 
So Excited!!!!

So now, the next sift depends on popular vote of the public. The top 8 will be asked to produce 8 more pieces to create a collection.  Then the top one will be chosen.
To vote go to  Fabric8 Semifinal Round
and vote for your favorite.  
You do not have to have an account but if you are voting more than one  per company you will need to create an account because only one vote per computer will count.  
There are so many beautiful pieces. 
It is worth a look.

I received my fabric yesterday.  I loved how it turned out.  I took it outside to photograph it but it was so windy but here is the picture of it anyway.  
post signature

Wednesday, April 11, 2012

Spoonflower Shop

I'm hooked!!!  
I have gotten hooked on creating fabric and patterns and just all that creative stuff.  
I enter the contests every week and 
when I am not working on a design I am thinking about it.   

I now have a shop online for anyone interested in purchasing the fabric or cut & sew fabric panels.  Go to the link for my shop.

Just a sampling of what you will find.
Most recently I created a dress design for a little girl (small size 2-4).   This is a cut & sew fabric panel which means no need to buy a pattern and fabric separately.  Buy the fabric and the pattern is printed on it.  Follow the simple directions and 1...2...3!  Add ribbon and it's a sweet little dress for that sweet little one. 

Isn't she adorable?  Even with her frog tattoo on her leg!


I also, completed my purse panels and they can be purchased here  or see other colors that are available. Also available are black, green, red, and soon to be available green/purple combination and purple/aqua combination.  The panel makes both purses pictured.


Fabrics are also, available by the yard. Here are just a few.   
Drop into the shop often.  
I add more every day or two.
(Below are 8" swatches)

Carried Away (For the love of books contest entry)
Crafty Ladies (The Artist and her Sister, the Quilter)


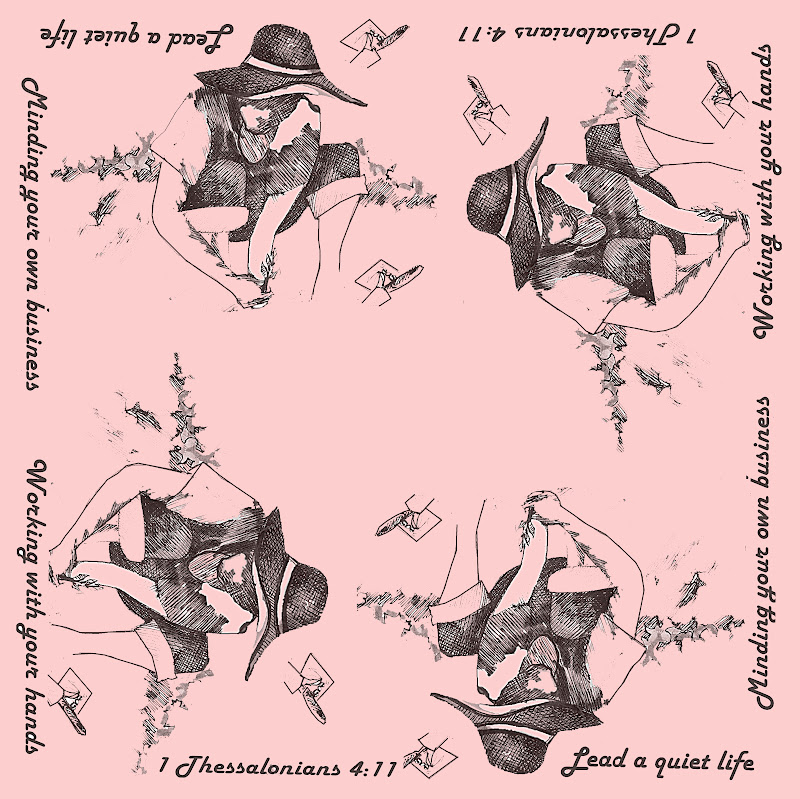
The Quiet Life  ( I Thess 4:11)

This  just in!
I gave Linda some of my Crafty Ladies fabric and this is what she did with it.  I think she is pretty smart.


post signature

Thursday, March 29, 2012

Spoonflower & Guest Blogging

Who among you has heard of Spoonflower?

Just a few of the fabric designs I have created.
Spoonflower is a site that allows artists and fabric designers to upload artwork and make fabric out of it.


I think I'm hooked!
I even sneak down at night to work on my designs!
Some of my designs started as paintings, some as pen & inks, even cartoons.  
The creative process is so fun.
My sister is a quilt designer.  She has been onto me for quite awhile to check this site out.  

Finally, she said it at the right time.  That was about two weeks ago.  Now, I think I have about 30 fabric designs on the site. 

Spoonflower sponsors weekly contests.  
I entered this week.  
The contest is to design a purse/bag using only one yard of fabric. 
The site also, allows designers to have a store front. 
My entry to the Spoonflower create-a bag-panel.
So jump over to Spoonflower and cast your vote.  Vote for as many as you would like. 


AND
I am the guest blogger on 
my sister's quilting blog.  
Actually, a fun little conversation online between sisters. 


Fabric Design: Crafty Ladies/ the artist and her sister the quilter.

Here is my purse I designed from concept to completion


post signature

Thursday, March 8, 2012

I See Spots: Using Ink and Intuition

After teaching nearly twenty years some of my projects are just rerun projects but worth doing again.  Actually most are reruns or adaptations of an old project.  
Detail of Intuitive Ink Spot Drawings
I think this project is one that over the years has continued to entertain and challenge students. 
The one I am currently working on (below) is a new look to an old project.   

Not finished but close
The project starts as an ink spot blown around with a drinking straw to set the stage.  There is just something about blowing ink around on a paper that entertains students.   They think it is really fun.  Most of my students will ask to do this and then often ask to do it again.  
I usually only work with 5 or 6 at a time so I can control the situation.  
I use water soluble black ink in a jar with an eye dropper, and cheap drinking straws. (We don't recycle the straws, fresh straw for fresh students.)

Intuition is key to the success of this project.  
The project is a great exercise in developing creative solutions.  

This 15 yr old demonstration piece I did uses imagery in the white spaces but the ink created the edges of the images such as the folds in the dress of the dancing woman or the dogs nestling together, the caterpillar on the branch.
Start with a few drops of ink on paper. Before the ink starts to soak in take a straw and with a sudden burst of wind, begin blowing the ink, following the trails of ink, turning the paper as necessary.   
I have used three variations and I know, there are more out there. 
  • 1. Use the white space left behind to add design without any planning just allowing intuition to lead you marks.  (Top example)
  • 2. Use imagery in the white spaces created by the random ink spots.  This takes more imagination and works best with older students. (Dancing woman)
  • 3. Use the random black ink spots to make creatures.  (Below: Fantasy creatures
  •   And I guess, if all else fails, as I say to my students....you can make anything into flowers or in this case, maybe trees.

This unfinished demonstration piece from 2 years ago uses the ink spots as the stimulus for the fantasy creatures using colored pencil over the ink.

Still waiting it's turn, the next ink challenge.  What can you see?

If Ink interests you be sure to see my post on March 6th Mixed Media: A Wash of Color and a Bit of Ink  uses ink in a more controlled method but fun just the same.   

It is feels so good to find time for creative play.
 post signature

Tuesday, March 6, 2012

Mixed Media: A Wash of Color and a Bit of Ink

It has been two months since I posted and I was not doing a very good job posting at that time.

There are so many projects we have completed at school that I know would be of interest to others.  Hopefully, soon I will get some more postings up.

Pen & Ink with a Wash of Color

Some projects are just more fun than others.  This project has been so much fun I am thinking I must do it again. 
Not only is the pen & ink application just a step  above drawing which is less intimidating to people who are comfortable with toning with pencil but the wash of color over the inked drawing is a great introduction to the application of watercolor paint.  I likened it to coloring in a color book when I was a child. The whole composition worked up very quickly.  

 For you art teachers out there this project has several objectives:create a strong focal point, create movement to the focal point and of course, experiment with various techniques in pen & ink and watercolor, mixing colors, etc. 
During inking process, starting to work on the values.
  • I started this piece by cutting illustration board or watercolor paper so that the paper is width of the paper is twice the length of it (12 x 24).  
  • Using a ruler select four areas that are to remain white.  As you can see in the finished painting the four areas left white are  in various sizes, shapes and locations so as not to make the composition symmetrical.  I also,was careful not to make a predictable cross out of the remaining positive shape.  
  • Decide placement of the focal point and movement to the focal point.
  • Drawing from life, I drew in flowers and leaves in pencil.
  • Once the drawing was finished I used a technical pen of permanent black ink to hatch in the drawing. (Before starting test to be sure it will not run when you add a wash of watercolor over it.  Some pens are going to be water soluble and will run. I used Zig permanent markers in nib size .05.  There are various brands to choose from.) 
  • Masking tape can be used to keep watercolor from flowing over into white areas.
  • Starting with the negative space I washed in the color, keeping my white areas clean.  
So that will do it for today.  
I hope you will find this post an inspiration to get out of your rut and try something different.  Last year at this time I challenged myself to do a painting a day.  I kept that up for a good many weeks before a busy life crashed my party.  I hope to get the momentum back soon! 
One of my students commented this week, "I love it that you have your project just like I have mine and we are all working on our projects at the same time." 
I agree!


post signature

Wednesday, January 4, 2012

Time to Think Challenges

Usually when someone says a week has been challenging, visions of difficult situations fill my thoughts but this has been a fun week of challenging activities at school.
Here are some of the fun activities we have done in the classroom but you may want to do them at home with your family members.
I think this is just the kind of activity that helps to grow stronger brain power.

Standing Straw Structure:
Can you make a straw stand up? These high school students were challenged to do just that.  To meet the requirements of the activity they were given instructions to take as many drinking straws as necessary and begin assembling them to make a freestanding structure using only an occasional miniature marshmallow to complete the task.  The structure has to stand at least 3 feet tall and stand alone for 30 seconds to satisfy the requirements of the challenge.

I used cheap neon colored straws that did not have the bend-y part and miniature marshmallows.  No other supplies were allowed. Students worked in teams of two or three and were given an hour to work on the structure.  Most were completed in the allotted time.

This assignment was a hit for the students.

Mr. Potato Figures:
The last time these students played with play dough was about ten years ago or maybe more but they jumped into the middle of this project with enthusiasm.  The assignment was to create a figure using a potato, play dough in various colors, and toothpicks.  The figure had to have all facial features, plus ears, hair, a hat, arms, hands, legs and shoes and something that suggested clothes such as a scarf or buttons.

Where is the challenge?  The potato itself can not touch the table.  It must be suspended above the table by at least an inch. I allowed an hour for this activity.  Most students completed the task in about 45-50 minutes.

High-schoolers enjoy revisiting their childhood.  Prepare yourself for laughter if you do this project. 


Make a Marble Run:
Here is one the whole family will get into.  It is just hard to stand by and watch without wanting getting involved.  There is just so much science in this activity and so much fun. To see more about the marble run see my post on June 21.


post signature

Sunday, November 20, 2011

November:A Month to Celebrate

In our household November is a month to celebrate. 

Seven birthdays of immediate family members: three grandchildren, one son, a daughter-in-law and both my mother and mother-in-law and then there is Thanksgiving.

The celebration only ends to begin the next one. 
And me.... trying to watch my weight!
Good luck with that!

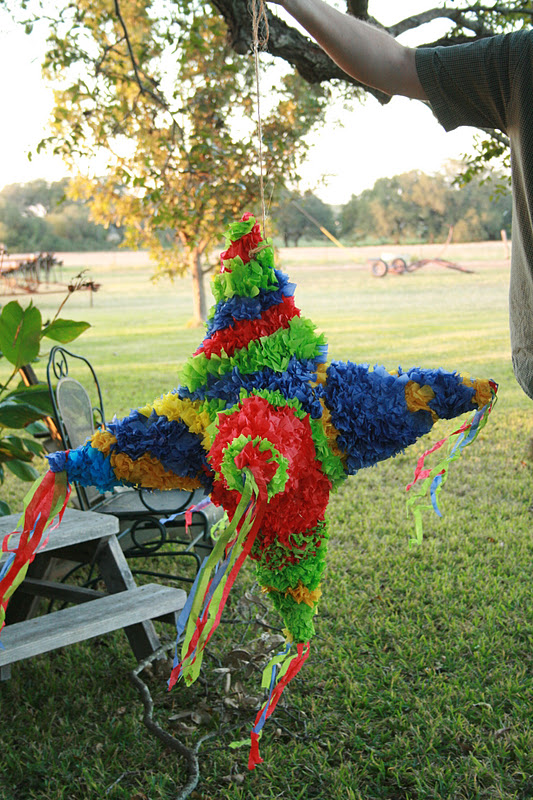
In the spirit of celebration our November projects have been the Pinata del Estrella (six pointed star), our rainbow fish pinata and a cornucopia.
Not one of them has been completed until the day of the party so far.  We are usually rushing to glue on the last few pieces of tissue paper to fill the bare spots.  


Side view of Rainbow pinata
Check out the kissy lips on this fish!
All pinatas nearing completion, Reese comes in from school asking if we could make a cornucopia.  I am assuming I must have reached Super-Nana rating in her mind since she just assumed I would know how to make one.  You know, just whip one up right quick so....
we just whipped one up right quick!

Now Pearson, 3 months shy of four is planning our Christmas tree pinata. 

Where do they get this ideas?

Okay, it going to be a beauty!

Papier mache cornucopia embellished with moss and dried leaves and greenery from the yard.


post signature

Thursday, November 3, 2011

Child's Play Mixed Media

My grand daughter has a shirt that says, "I learned everything I need to know in kindergarten."
She is in kindergarten!
I am expecting this to be a really busy year for her.
Crayon and glue line drawing and painting has started.
In my high school art class we are leaving behind the papier mache pumpkins, pinatas and masks we have been making and are moving on to mixed media.
The supplies we are using for the assignment are all the things you would use in kindergarten:
Crayons
Glue and
Prang or Crayola Brand Watercolor (8 color tray)

I set out bunches and bunches of cheap, artificial flower bouquets in red, yellows and oranges  I found at Walmart this past week for three to five dollars per bouquet.  I flooded the tables with the flowers for this spontaneous and quick painting.


  • Begin by making a contour line drawing using crayon.  
  • Switch to white Elmer's glue and continue drawing using glue, adding details, outlining and applying glue where light areas are needed.
  • Set aside until all the glue is completely dry (up to 24 hours or more sometimes, depending on how deep the glue is).
  • Drop a little water in the top of all the colors in the watercolor tray to begin moistening the colors so you will have very intense color available.  
  • Wet only the area you want to paint such as one leaf or petal, apply color on one side of the wet area then apply a second color on the opposite side quickly, then stop!  Allow the water to transport the colors, blending sponanteously. Resist going in and "fixing" it.
  • Paint directly on the paper using primary colors to create the secondary colors on the paper. (IE:Add blue on one side of a leaf then yellow on the opposite side and watch the green develop)
  • Continue painting using this method.  
  • When the paints are all dry go back and adjust colors as necessary, deepening the values and contrasts. 
Demo piece for Child's Play Mixed Media
Resist the urge to try to make the painting "perfect".
Often that is when you lose the painting by overworking. 

Most importantly, let loose and enjoy the spontaneous nature of watercolor.

Both the glue and the crayon resist absorbing paints leaving a white or faint area in it's play. 


post signature